If you have any sort of device that cuts like a CNC mill or a laser cutter, you probably generate a lot of strange-looking scrap material. Most of us hate to throw anything away, but how do you plan to use all these odd shapes? [Caddzeus] has an answer. Using a camera and some software he digitizes the shapes accurately into a form usable in his CAD package of choice.
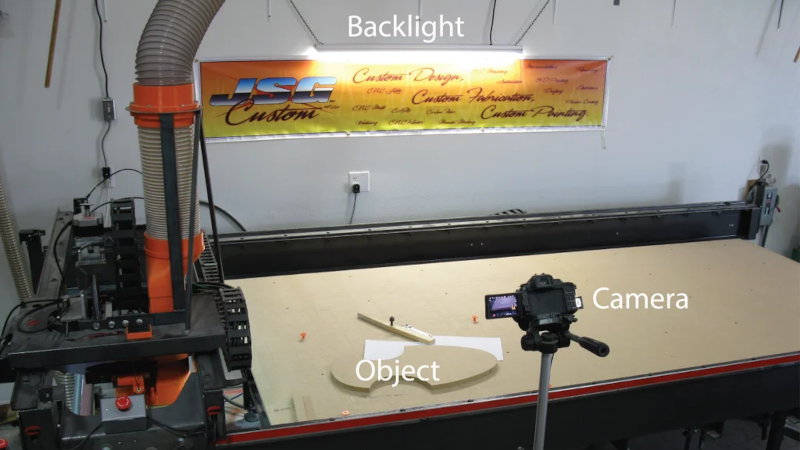
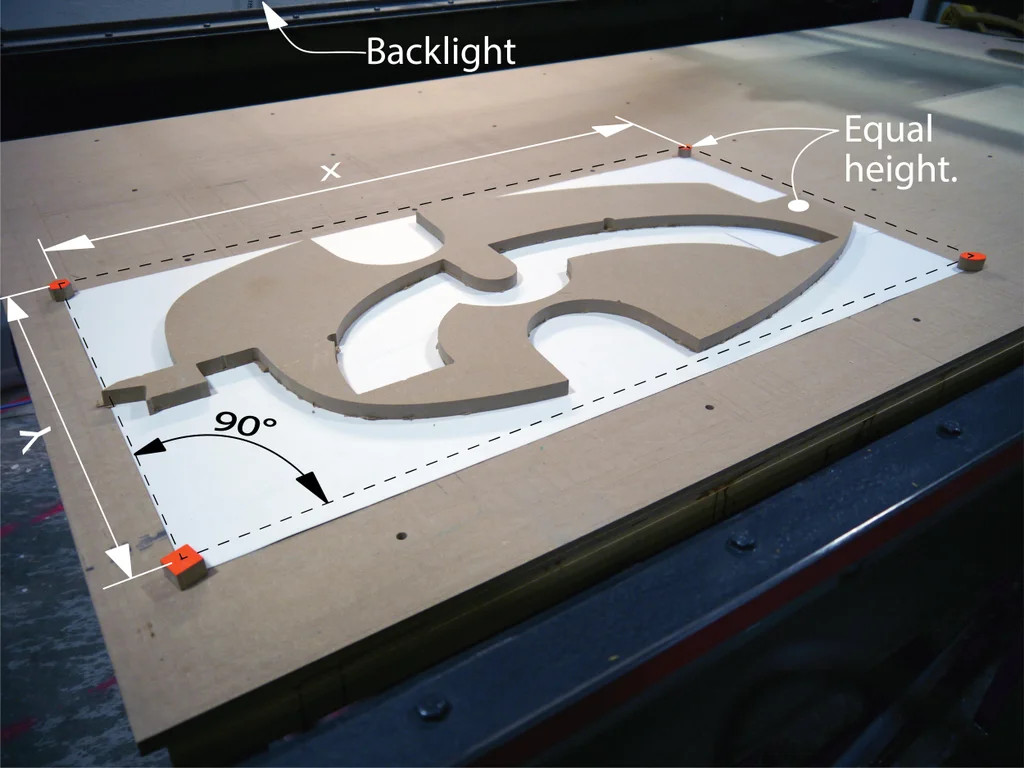
The process involves setting up some targets with known dimensions that will appear in the photograph. This allows the picture to be taken without being overly concerned about the distance to the camera or the angle.
 Using GIMP, he adjusts the images to remove the perspective. He then brings the image into Inkscape where he can accurately scale and trace the shape.
There are detailed instructions — including videos — but if you know how to use these tools, you can probably figure it out for yourself. This technique would be useful, too, if you wanted to get an outline of something you intend to mill or cut into your CAD program as a reference. We like to do this with a laser cutter so you can burn the outline of something you are engraving or cutting on a piece of paper before you start and easily align the workpiece to the laser.
Of course, a small part could surrender its image to a conventional scanner and you can use a similar technique to adjust the scale. If you start using Inkscape a lot, you’ll want more plugins. You never know what you might build from some scrap odds and ends.


You get more accurate results if you make the pictures perpendicular in the first place, so you don’t have to remove the pespective at all.
You can also mount a camera on you CNC router. Then you can just make a matrix of pictures and stitch them together. A camera on your CNC machine is also handy for all kinds of measurements. For example, if you want to know the location of some feature, just put it in the center of the camera (a cross helps) and then take over the coordinates from your CNC machine.
And of course, often it’s not even needed to take pictures at all. If you’ve just routed out some parts, then the exact dimensions of the scrap is also in your G-code data.
I like bCNC. It can be used to control a GRBL based CNC gadget, but it can also be used to convert between some formats. For example, read a DXF file and convert to G code, or read G-code from disk and save (a part of it) as a DXF file again.
Yet another method I use for small parts (those are the ones most often made from scrap) is to first print the CNC vectors on paper, and then physically fit the paper on your scap part. From that you can use any recognizable feature to find a coordinate for starting your milling operation. (Yes this also works with a camera). bCNC has built in camera support (and so does openPNP).
Taking a photo that is perfectly on the normal of the object is difficult to do. And, perspective correction is pretty easy, especially if you have a grid you can lay the subject workpiece out on. A lot of photo processing software has super easy perspective correction (as well as barrel distortion correction).
Not just for using CNC off-cuts but also oddly shaped things like wood slabs, drift wood and so on. And, useful for incorporating grain features (like knots, cracks, swirls, …) into your design.
“You get more accurate results if you make the pictures perpendicular in the first place, so you don’t have to remove the pespective at all.”
You can’t be perpendicular to the whole piece at once no matter what you do; center the camera over the piece and look straight down, and you’re looking at the edges at an angle. A camera placed at a finite distance from the piece is only going to have a perspective-free view of one point on the piece’s surface.
So, if you’re going to have correct for perspective no matter what you do, why not find a general solution that works for any camera location?
What a great idea! From a single photo to a usable cad file in just a few minutes. No paid software, no complex machine setup and works on any size part. Nice work!
I’ve used command line Imagemagick to remove perspective from photos of WWII vehicles, and vintage computer instrument panels.
For instance, a three-quarter front view of a truck with a particular set of markings or camouflage pattern on the side can be mapped to a flat image so that the result can be used to reproduce the pattern on a restored vehicle. Or similarly a computer panel, so that lights, knobs and switches can be placed precisely.
To do this, the pixel coordinates of corners or salient features in the photograph are found. There may be four, five or more.
For instance four points directly off a perspective b/w photo of a computer panel:
675,141 TR
646,315 BR
442,336 BL
458,129 TL
Now those same points need to be found from a flat profile, 3-view diagram or engineering drawing the original is being mapped to. Only the original width and height of the panel is needed, or failing that, points that describe the correct aspect ratio:
711,0 TR
711,477 BR
0,477 BL
0,0 TL
The number of output coordinates should equal the number of input coordinates.
Now the perspective is removed by using an affine transformation with the IM convert tool:
convert computerpanel.jpg -virtual-pixel black -distort Perspective “675,141 711,0 646,315 711,477 442,336 0,477 458,129 0,0” computerpanel_transformed_true_flat.jpg
That’s all there is to it!
nice!