Unmanned Production Drives CNC Machine Tool Monitoring With Automatic Corrections
At medical technology specialists, Günter Stoffel Medizintechnik GmbH in Wurmlingen Germany, high-precision CNC machining and traditional craftsmanship form the basis of the company’s success. Blum-Novotest touch probes, laser measuring systems and probes ensure productivity by enabling the unmanned production of the tiniest components.
“Common to all Stoffel instruments is the highest precision. Whether with the tiny spoons of the biopsy tongs, whose cutting edges have to meet to the hundredth of a millimeter in order to cut cleanly, or the tweezers with the tiniest teeth at the tip – our aim is always to manufacture so precisely that the multi-part instruments can be mounted and function cleanly,” emphasizes Managing Director Dieter Stoffel. “With the exception of electropolishing, we cover all production steps in-house.” Components manufactured on state-of-the-art CNC centers are deburred, adapted, polished and assembled by hand.

Productivity plays an important role at Stoffel. In 2021, investments were made in a five-axis milling machine from DMG MORI including a laser measuring system from BLUM and automation by a Fanuc robot which inserts raw parts and removes finished parts. The new machine can thus work overnight or the whole weekend without human intervention. However, it is essential that the tools are monitored during unmanned production in order to detect tool breaks, wear or damage to tool cutting edges. This is the only way to avoid rejects through automatic corrections or, for example, the substitution of a sister tool.
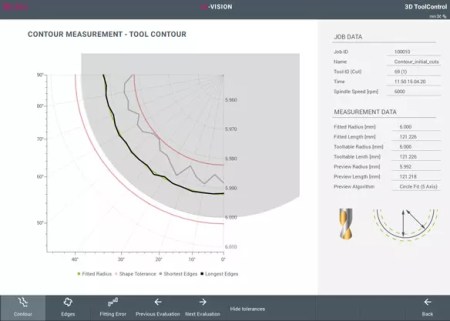
On the new machine, in contrast to the previous machine, it was now important not only to detect tool breaks, but also damage to the tool cutting edges. For this purpose, the production experts use the LC50-DIGILOG laser measuring system from BLUM. This can record thousands of measured values per second. Among other things, changes in geometry at the tool cutting edge, for example due to wear, can even be detected on the tool rotating below working speed.
Especially since the desired tolerances are very narrow and often less than one hundredth of a millimeter. Stoffel’s products consist of several very small parts that are assembled together, and the tolerances swing up. In addition, the components are so small that a subsequent measurement would be very time-consuming. The parts need to be assembled to see if they fit together geometrically. If something gets stuck, you have to readjust the machine. Of course, this is not possible at night and on weekends. Nevertheless, Stoffel must always know immediately whether the parts are in order – and the easiest way to do this is to regularly check the tool cutting edges with the laser measuring system.

In order to reliably remove the tiny chips, Stoffel works with a lot of cooling lubricant – and the laser ‘must be able to do that’. The LC50-DIGILOG nevertheless measures high precision, as it is possible to measure the cutting edges cleaned by the HPC blow nozzle at full machining speed and thus the cooling lubricant is thrown away from the tool. On the other hand, the LC50-DIGILOG can reliably distinguish coolant and tool cutting based on the many measured values and the resulting plausibility tests, which excludes incorrect measurements.
Stoffel has been working with Blum-Novotest in the field of production metrology for over ten years. For this reason, the new LC-Vision software for BLUM laser measuring systems and the TC52, a measuring probe from BLUM, are also installed on the machine. “One of the measuring tasks of the latter is the control of the fourth and fifth axes. Here, the pivot point of the axes is measured and entered in the machine parameters in order to obtain optimal kinematics even in the swivel movement,” explains Dieter Stoffel. “A lot depends on this measurement, if the pivot point of the axes does not exactly match the coordinate system of the machine, errors occur on the workpiece during simultaneous or swivel machining. That is why this measurement is regularly carried out on a measuring sphere mounted in the machine – here, too, processes are only made possible by the BLUM measuring system.”
For more information: www.blum-novotest.com


