As laser cutters and engravers are getting cheaper and cheaper, the time has come to give one of them a try. Here is a close look at the Atomstack A5, a 20 W laser engraver.
Like 3D printers, laser cutters and engravers are getting cheaper all the time, which is why I decided to give one of them a try. A few days later I received an Atomstack A5. This is a 20 W laser engraver, not a cutter, even though it can cut plywood up to four or five millimeters or so. Also, it is not suited for metal, officially, as it appears to be able to engrave aluminum alloys too.
Assembling the Atomstack A5
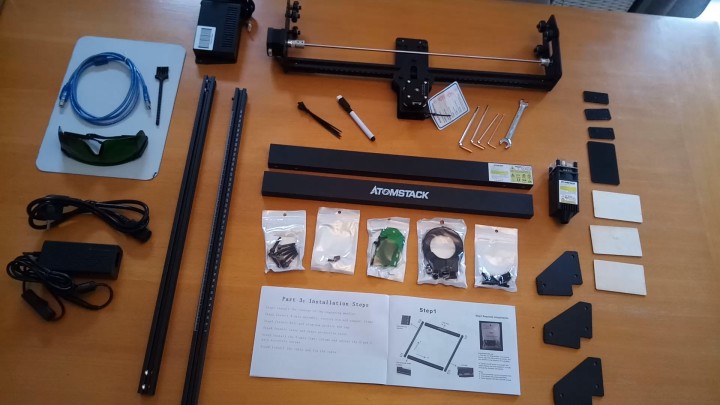
The A5 comes as a kit of parts that you must assemble yourself. This is not very difficult, and all the tools required for it are included in the kit. The six steps in total take about 30 minutes to complete and you are rewarded with a good solid quality assembly. It is all sturdy aluminum, no plastic parts (except for the eye protection). The Atomstack A5 Laser Engraver kit contains everything you need, including tools.
Tight But Not Too Tight
Make sure to tighten the belts properly. Not too tight, and not too loose either, you want a smooth slide. Same goes for the guide wheels in step 5. If they are too tight, you may feel clicks when moving the X-axis; if too loose, things may start to wiggle. The laser head has a guiding wheel too, it may need adjusting as well.
Control Software
The software to control the Atomstack A5, LaserGRBL, is free. There is also LightBurn, which is not free but has a time-limited full-function free trial period. You may want to give it a try once you master the engraver.
The installation manual included in the kit does not say anything about using the engraver, and neither does the Atomstack website. The LaserGRBL tool, which, BTW, is an open-source tool developed by arkypita and unrelated to Atomstack, has help for itself but gives no real guidance either. Instead of searching YouTube for a tutorial, I decided to try to figure things out myself. The Atomstack A5 is 100% compatible with the free tool LaserGRBL.
Based on Arduino & Open Source Software
After connecting the A5 to my Windows 10 computer, I noticed that it needed a CH340 USB-to-serial converter driver. However, you don’t have to search for it online as it is conveniently included in LaserGRBL, in the Tools menu.
There is also an option to upload firmware, which is possible because the Atomstack control hardware is actually a custom Arduino running the popular open-source g-code interpreter GRBL. This is good news for makers and hackers as there is no proprietary stuff inside the A5.
Cutting and Engraving
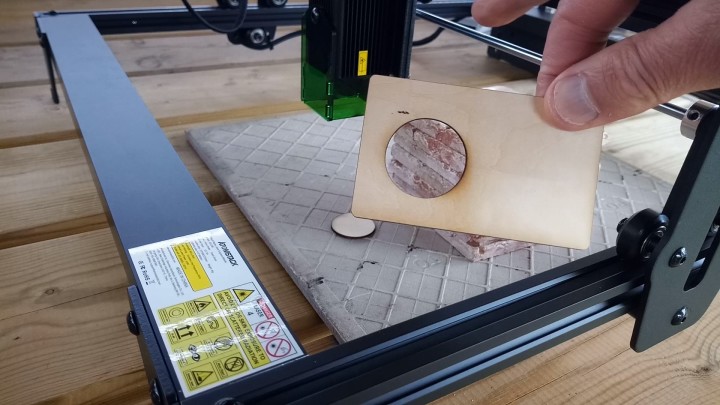
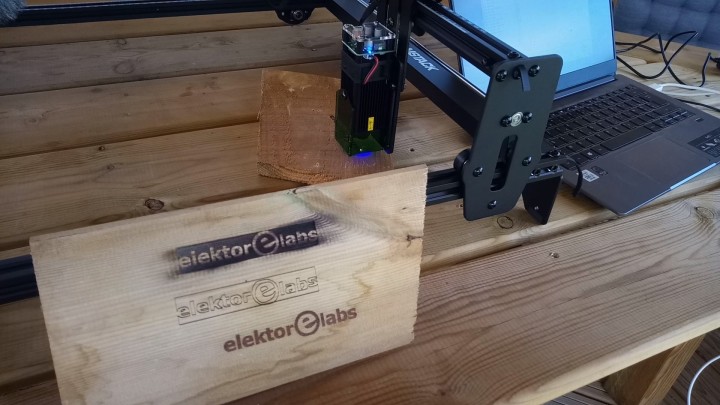
As a first try, I repeated the plywood-cutting benchmark test shown in a video on the LaserGRBL website. I loaded the example drawing in LaserGRBL and hit the Play button. A few minutes later I had a circle cut out of one of the small plywood boards that are included in the A5 kit (together with some plastic sample material). The A5's 20 W laser can also cut through plywood.
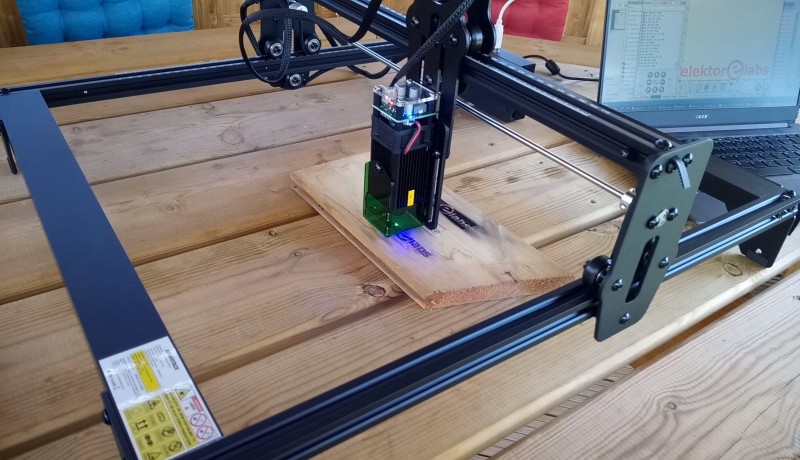
Engraving an image on a piece of wood was a bit more difficult. Engraving is easy enough to get going but engraving something properly requires practice and experimenting. However, after several bad and burnt engravings, I managed to get a clean result.
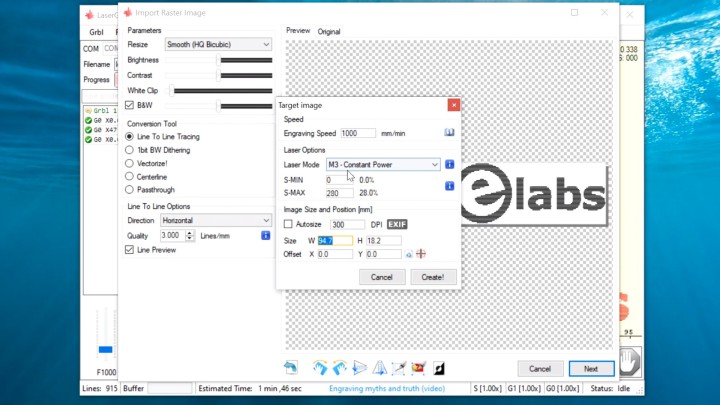
The trick was consulting the material database built into LaserGRBL. It has a section on the Atomstack A5 which suggests setting the laser power to 28% for wood. Using this value with constant power instead of dynamic power produced a nice-looking result. Also, focusing the laser by moving the head up and down is important.
Smoke is Bad for Your Health
I highly recommend doing all this in a well-ventilated room or, even better, outside (like I did). Laser engraving works by burning material and therefore produces smoke of various toxic levels that you don’t want to inhale. Also, keep your protective goggles on!
Atomstack A5 Summary
The Atomstack A5 laser engraver is a complete kit including tools, green goggles, and even some sample materials to practice on. Assembling the kit is easy and, when done correctly, results in a strong, sturdy tool with smoothly sliding X- and Y-axes and a stable head. It takes a bit of practice to obtain good results.
Adjusting the head's height could be a bit more comfortable, but maybe not at this price level, and the fan is a bit noisy.
The A5 relies on Arduino and third-party open-source software for controlling it, so by adopting the A5 you don’t get locked into half-baked buggy programs that never get updated. The software is easy to use and you can start engraving immediately.
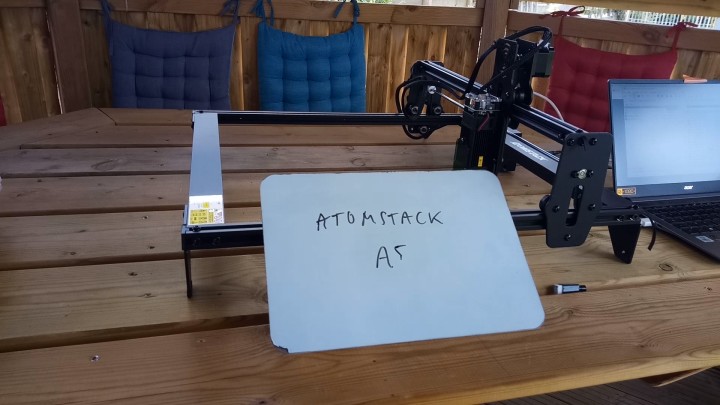
One question remains, though: what am I supposed to do with the small whiteboard and the felt-tip marker included in the kit? What are you supposed to do with the whiteboard included in the kit?
Read full article
Hide full article
Add a rating to this article
★★★★★
★★★★★
Page 1 / 1
Login
No account yet?Register for free!
Forgot password?
Please enter your email address. Instructions for resetting the password will be emailed to you now.

Discussion (2 comments)